There are numerous free blog management and hosting options available on the Internet. Many have extremely easy to use browser interfaces. The one I use and
recommend is Blogger, at http://www.blogger.com.
Blogger was started by Pyra Labs in August of 1999. In February 2003, Pyra Labs was acquired by Google. So there is a fair chance that Blogger will be around for quite some time. Indeed, Blogger has gone ahead in leaps and bounds since getting the resources of Google behind it.
how to setup blog?
Setup Instructions:
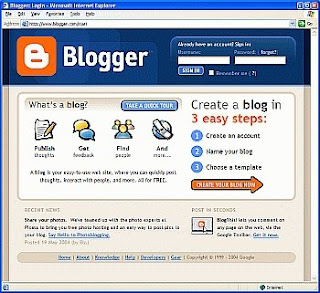
Step 1. Blogger Home Page
Connect to the Internet and point your browser at http://www.blogger.com. You should soon see the Blogger Home Page displayed. See Figure 1.
As you see, Blogger promotes the fact that you can create your own blog in just three easy steps - and so you can - but to set up a more functional blog on the Melb PC Internet Service requires the Advanced Blog Setup process which takes a few more steps. Hence I decided to write this step-by-step guide for you.
Click on the "Create Your Blog Now" option
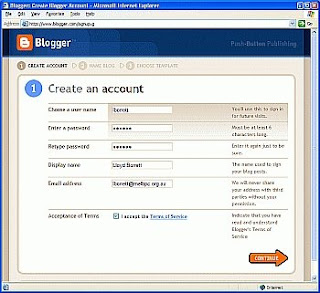
Step 2. Create An Account
You should now see the "Create an account" page. See Figure 2.
Take your time and fill in the details.
For "Choose a user name:", if it's available on Blogger.
For "Enter a password:", Then it's one less different password for you to remember.
For "Display name:", just type in your own name, eg. "afdfdghhh".
For "E-mail address:", eg.dgdlk@gmail.com", or some other e-mail address that you prefer.
Accept the terms.
Click on the big "Continue" button at the bottom of the page.
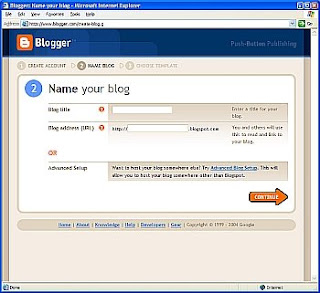
Step 3. Name Your Blog
The "Name your blog" page should now be displayed. See Figure 3.
If you want Blogger to host your blog, then fill in the details at the top of this page, and click on "Continue".
The rest of these instructions are for those who choose "Advanced Blog Setup". However, parts of these instructions may also be useful to those who choose the Blogger hosting option.
But this is not recommended to use ,it is lengthy process ,while using this hosting some times it may crash...
so better way to blogging is ist method..
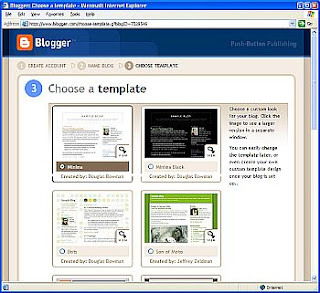
Step 4. Choose a Template
You should now see the "Choose a Template" page. See Figure 4a.
Take all of the time you want to decide on the template that best reflects your personality, then select a template. For the purpose of this article, I have chosen the default "Minima" template by Douglas Bowman.
Then scroll down to the bottom of the page and click on the "Continue" button.
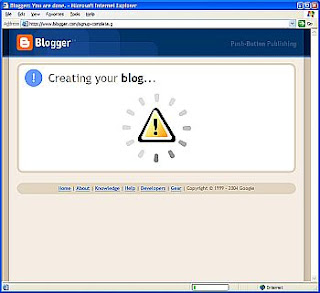
Blogger displays a page that animates while creating your blog. See Figure 5b, Creating Your Blog.
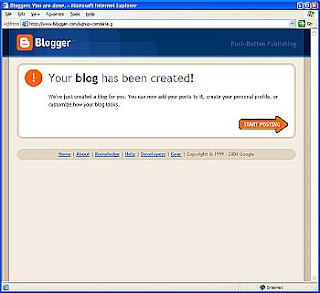
If everything has gone okay, you should then see the "Your blog has been created!" page. See Figure 5c.
Click on the "Start Posting" button.
Step 5. Settings - Basic
You should now see the "Create New Post" page. See Figure 5a.
You could now just create your first post and go for it. However, I recommend you first step through the "Settings" options with me to fine tune a few things and make your blog more useful.
Click on the "Settings" tab near the top of the page.
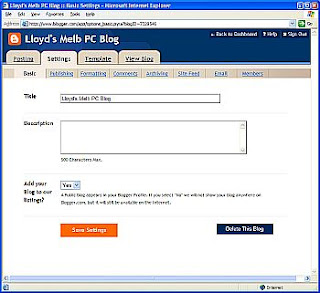
You should now see the "Settings - Basic" page. See Figure 5b.
Want to change your blog "Title"? This is where you do it.
. Figure 5a.Create New Post � You could start posting
to your blog, but we will go through some more
setup options first.
If you want to, type in a short "Description" of your blog.
I recommend selecting "Yes" for the "Add your blog to our listings?" option. It's one of the best ways to get the fact that your blog exists known to the rest of the world.
Now, click on the "Save Settings" button. The page will refresh and you should be told that "Settings Were Saved Successfully".
Next, click on the "Publishing" tab.
Step 6. Publish Your First Post
The Blogger "Dashboard" page should now be displayed. See Figure below
From the "Dashboard" page, select your blog name in the list of Blogs, eg. "Learning is for every one..".
Click on the " new post" button.
The Blogger "Create New Post" page should now be displayed. See Figure below
Enter a "Title" for your post, eg. "My First Post".
Enter some content for your post, eg. "Here we go with the first post.". Creative, aren't I?
You could preview the post, save it as a draft, or play with more post options. But let's save that for another time.
Now is the time to bite the bullet and really see if everything is setup properly.
Click on the "Publish Post" button.
If something goes wrong, Blogger will display a "Publishing failed" page. Just go back though each of the steps in this article, checking everything carefully as you go, and then try again.
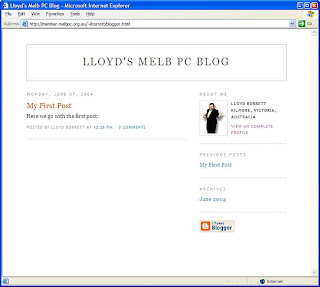
But if everything worked okay, as it should, Blogger will display the "Your blog published successfully" page. See Figure
You Have a Blog
Eureka! Your blog is now a happening thing!
If you click on the "View blog" option, you will see your blog ......


0 comments:
Post a Comment